
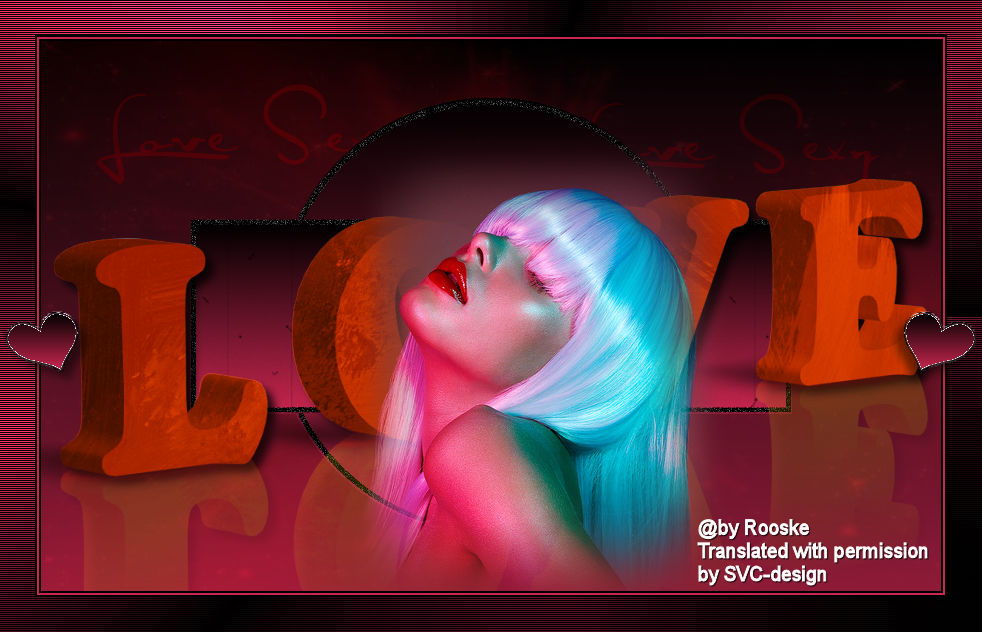
This lesson is made with PSPX9
But is good with other versions.
© by SvC-Design

Materialen Download :
Here
******************************************************************
Materials:
achtergrond.jpg
brush.psp
klein hartje.psp
lilibule_withlove63.psp
lizztish_technicolour1.psp
template.psp
******************************************************************
Plugin:
Plugins – Unlimited 2.0 - Photo Aging Kit.
Plugins – Unlimited 2.0 - Mock - Bevel
******************************************************************
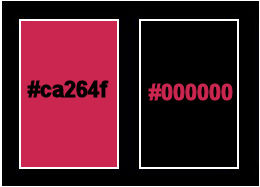
color palette
:
******************************************************************
methode
When using other tubes and colors, the mixing mode and / or layer coverage may differ
******************************************************************
General Preparations:
First install your filters for your PSP!
Masks: Save to your mask folder in PSP, unless noted otherwise
Texture & Pattern: Save to your Texture Folder in PSP
Selections: Save to your folder Selections in PSP
Open your tubes in PSP
******************************************************************
We will start - Have fun!
Remember to save your work on a regular basis
******************************************************************
Foreground: #ca264f
Background: #black
Gradient: linear – angle 0 - her 0
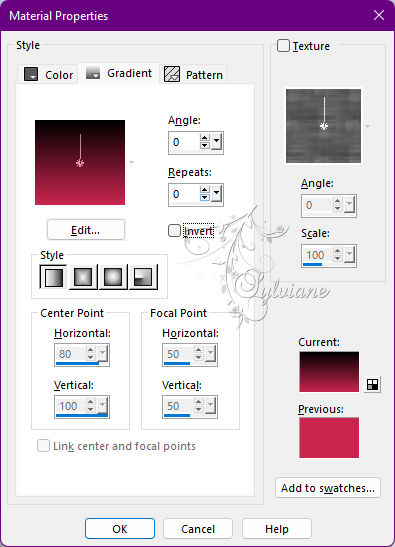
0
1.
Open a new transparent image 900 x 550 px
Fill with gradient.
Layers - New Raster Layer
Selection - Select All
Open achtergrond.jpg
Edit – Copy
Edit - Paste into selection
Selections - select none
Set the layer opacity to 30.
2.
Export the brush to custom brush.
Layers - New Raster Layer
Activate your brush and find your brush.
Stamp a few times with foreground and background on your creation.
Set the layer to soft light.
Activate the top layer
Layers – merge – merge down and repeat again.
3.
Open the template - click in the shape with your magic wand - feather and tolerance on 0 and select
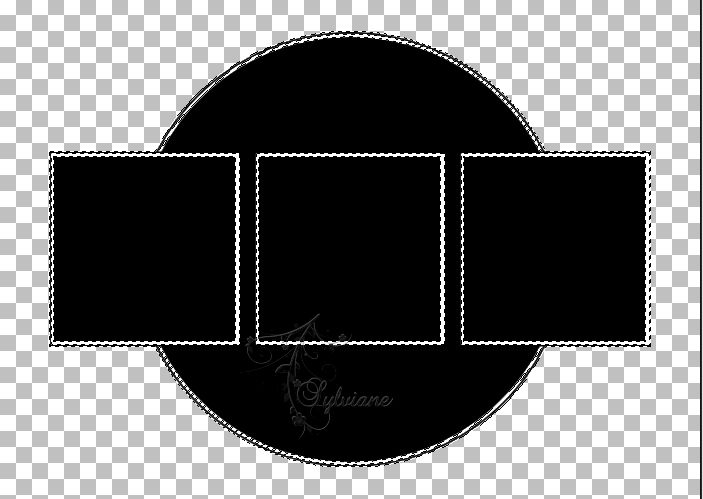
Fill the entire shape with gradient.
Open template.psp
Edit – Copy
Edit - Paste as new layer
Looks good right away.
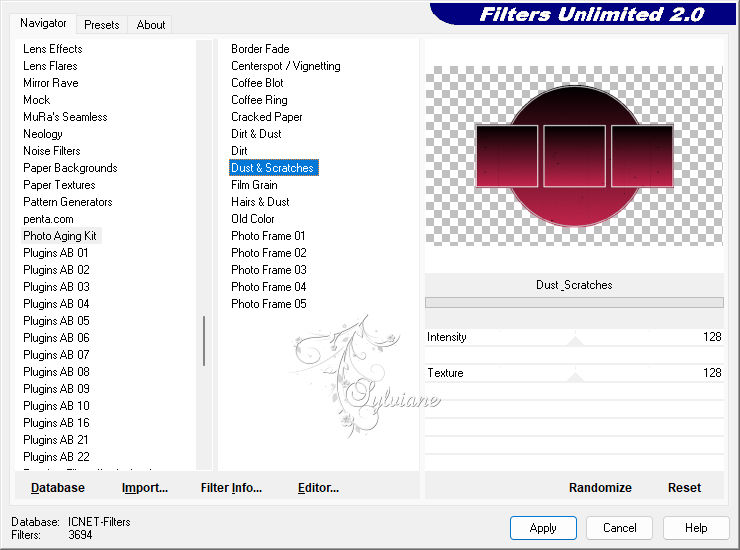
Plugins – Unlimited 2.0 - Photo Aging Kit.
In the right column – Dust & Scratches – find both sliders at 128
4.
Open lizztish_technicolour1.psp
Edit – Copy
Edit - Paste as new layer
Image - Mirror – mirror Horizontal
place her a bit to the right outside the circle.
Activate the layer of the template.
Erase the line of the circle in the hair and arm.
5.
Click with your magic wand in the edge of the circle so that it is selected (only the edge)
Do the same with the edges of the other shape.
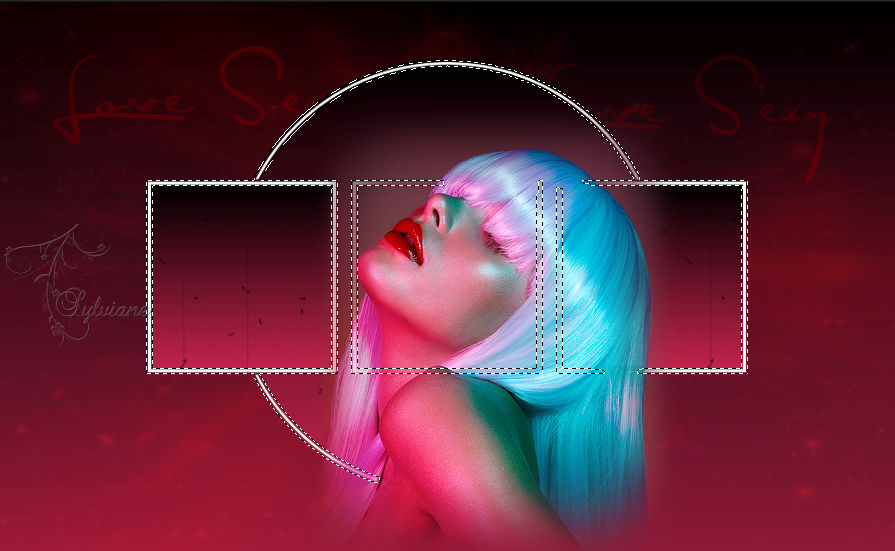
Fill the selection with black.
Adjust - Add / Remove Noise - Add Noise - 50.
Selections - select none
Layers – merge – merge down
6.
Activate the layer of the template.
Open lilibule_withlove63.psp
Edit – Copy
Edit - Paste as new layer
Put her about half way down
Effects - 3D Effects - Drop Shadow
8/8/50/13 color:#000000
Layer – merge – merge all (flatten)
7.
Image - Add Borders – Symmetric - 2 px - color: Background
Image - Add Borders – Symmetric - 2 px – color: Foreground
Image - Add Borders – Symmetric - 2 px – color: Background.
Set your gradient to radial - angle 90 - rep 8.
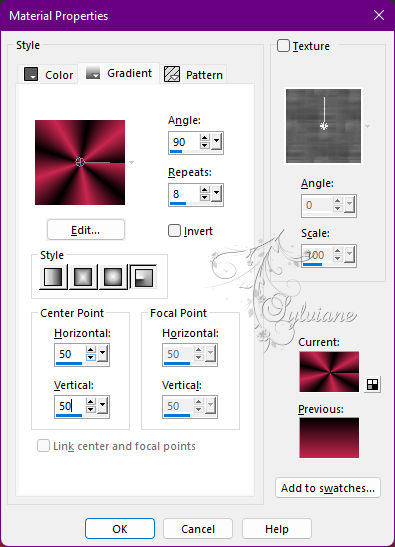
Image - Add Borders – Symmetric - 35 px - color: neutral
Select the border and fill with gradient.
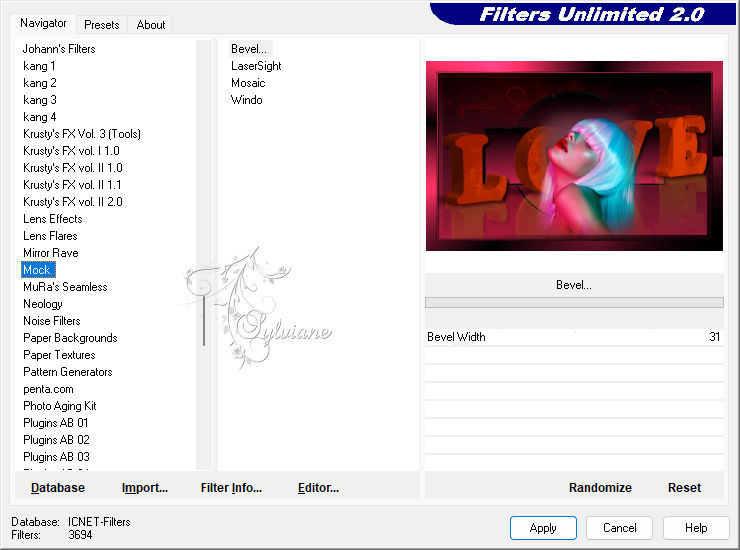
Plugins – Unlimited 2.0 - Mock - Bevel - Default.
Plugins – Jeux de lignes – Entrelacement.
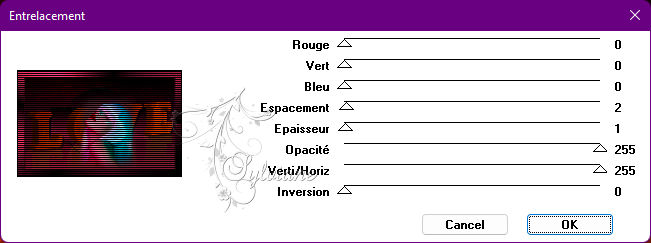
Selections - select none
Open klein hartje.psp
Edit – Copy
Edit - Paste as new layer
Effects - 3D Effects - Drop Shadow
8/8/50/13 color:#000000
Layers – Duplicate
Image - Mirror – mirror Horizontal
Put your name on your creation and merge all layers.
Make your crea 600 px longest side.
Adjust - sharpness - sharpen.
Save as JPG.
Back
Copyright Translation © 2022 by SvC-Design